Saturday, August 28, 2010

1971 Honda CB750 Bobber

At long last an update!!

So after discovery the awesome that is Craigslist, I kind of went on a selling spree. One item in particular that I was hoping to fetch a solid price for was my 2005 15" MacBook Pro. Expecting about $400, I posted it for $600, just because that's what makes Craigslist awesome. I find a buyer who's willing pay $500, which was just fine by me. That very same day, I come across a listing for a 1971 CB750 for $600. Long story short, I fell in love with it, talked the guy down to $500 since the bike wasn't running, and popped it on a buddy's trailer. So a 5 year old laptop that was on it's last leg for a 39 year old motorcycle that needed a little TLC? Solid trade in my opinion.


So having no mechanical experience whatsoever, I was really banking on the bike not running because of something easy, with "easy" meaning old gas/oil, fouled spark plugs, or clogged carbs. So starting with the easiest of the easy, I removed and drained the gas tank.


I should of snagged a picture of the gas that was coming out of the tank, it was almost a reddish color, which is clearly not the color gas is meant to be. I'm hoping that there isn't any issue with rust inside the fuel tank, which would explain the reddish hue of the old gas. I then emptied the old oil and put 2 fresh quarts into the tank. Next up was the carbs, now this is the extreme limit of my mechanical knowledge. I know the mix gas and air and feed that into the engine, and that's really about it. So I went ahead and just popped them off.

When I removed the cap to the float chamber, a rush of red gas came pouring out. I was feeling pretty confident that this was a primary factor of the bike not starting. Armed with trusty carb and throttle cleaner, I sprayed the shit out of those carbs, and that was really about it. I didn't want to fully disassemble them, considering I would most likely not be able to put them back together. I let them dry, and then mounted them back onto the bike. I also changed out the spark plugs, which didn't make for exciting photography, so no pictures of that.

I had everything reassembled, and it started right up!! Now it wasn't all roses. It was running pretty rough, wouldn't stay running without throttle, and periodically had what sounded like small backfires (timing issue). So fast forward another week and another carb cleaning, I've got it running smoothly (at least I think it's smooth), and took it for a quick once around the block. Once I get it tuned up a bit more, I'll work on putting a video up. Speaking of videos, I still need to get one of the moped up, which needless to say will take a backseat to the CB750, but it will still get some love from time to time.

Oh and I completely forgot to mention the hilarious seat the guy I bought it from put on the bike. It's pretty much a piece of metal thats been upholstered and is held on by velcro! Hilarious I know...


Monday, July 19, 2010

RELEASE THE KRAKEN!

I'm gonna start off by acknowledging that I really fell off the project bus. My computer and TV combine to make one wicked temptress. I'm hoping that I can keep to it a little better and ease myself off of my less productive habits. Anyway, off to the build!

It had been about two months since the death of the Sailor Jerry hookah. We had been through a lot, but poor design on my part made it nearly impossible to clean, and it was getting pretty nasty.

I had come across a lovely new brand of rum called The Kraken. A little smoother than Jerry, but more potent. A clear winner IMO.

I started off with the same basic items, although this time I opted for some higher quality parts. For instance I purchased an actual hose for the hookah, as opposed to the plastic tubing that was used in the last build (although I still use a little bit), and I picked up these metal rods from the nearby smoke shop.

The first thing I tackled was the center pole, that transfers the smoke from the bowl down into the water. A quick application of the Loctite and I had myself a nice center rod.

The last hookah I built, I ran the center rod through the cap of the bottle, allowing it to be screwed in. While this was convenient, I wanted to be able to break the hookah down into the simplest pieces possible. So with some handy teflon tape, I wrapped up the top of the pipe so that it fit snuggly into the bottle opening.
I then did the same around the mouth of the bottle for the bowl to fit onto.
Now I had to drill the hole in the bottle itself, a step I was not looking forward to. With my handy glass bit, and a solid 5 minutes of gentle drilling, I managed to punch through and give myself a hole for the hose. I wasn't too pleased this time around, I remembered the first hookah having a much smoother hole, but once it's caked in Loctite, it won't really matter.
Now for the hose itself. I wasn't sure how exactly to mount it to the bottle itself. This is where I lucked out completely. The plastic I had leftover fit PERFECTLY into the hose. So the plan then became to put a piece of plastic tubing into the bottle, and leave enough hanging out for the hose to slide over.
And that finished up the hookah...or so I thought. I pieced it all together, and then realized that I had forgot to put on the tin lid! This posed a problem, as with the bowl sitting over the center pipe, the lid couldn't sit on the pipe itself, as it did on the last hookah. But then, stroke of genious! I drilled a huge hole in the tin lid, one that matched the diameter of the bottom opening of the bowl. This then allowed me to mount the bowl the same way, as well as left the bottom completely open if it needed to be removed and cleaned.

So here's the beast in all it's glory. Still giving the Loctite some time to dry before I give it a use, and even then I'm gonna give it another cleaning to ensure and leftover bits of glass or metal from the drilling is cleared out. I know tobacco is bad enough, so the last thing I'm wanting in my lungs is tiny bits of metal/glass.


Monday, June 21, 2010

DAELANS RIDING HIS BIKE THATS WHAT HES DOING

FINALLY GOT IT WORKING!

Turns out the chain wasn't tight enough! Who woulda thunk it? All that's left is a few tweaks to get it running a little smoother.

Nearly 4 weeks of painful pitfalls, finally completed!


Wednesday, June 16, 2010

Citronella Wine Bottle


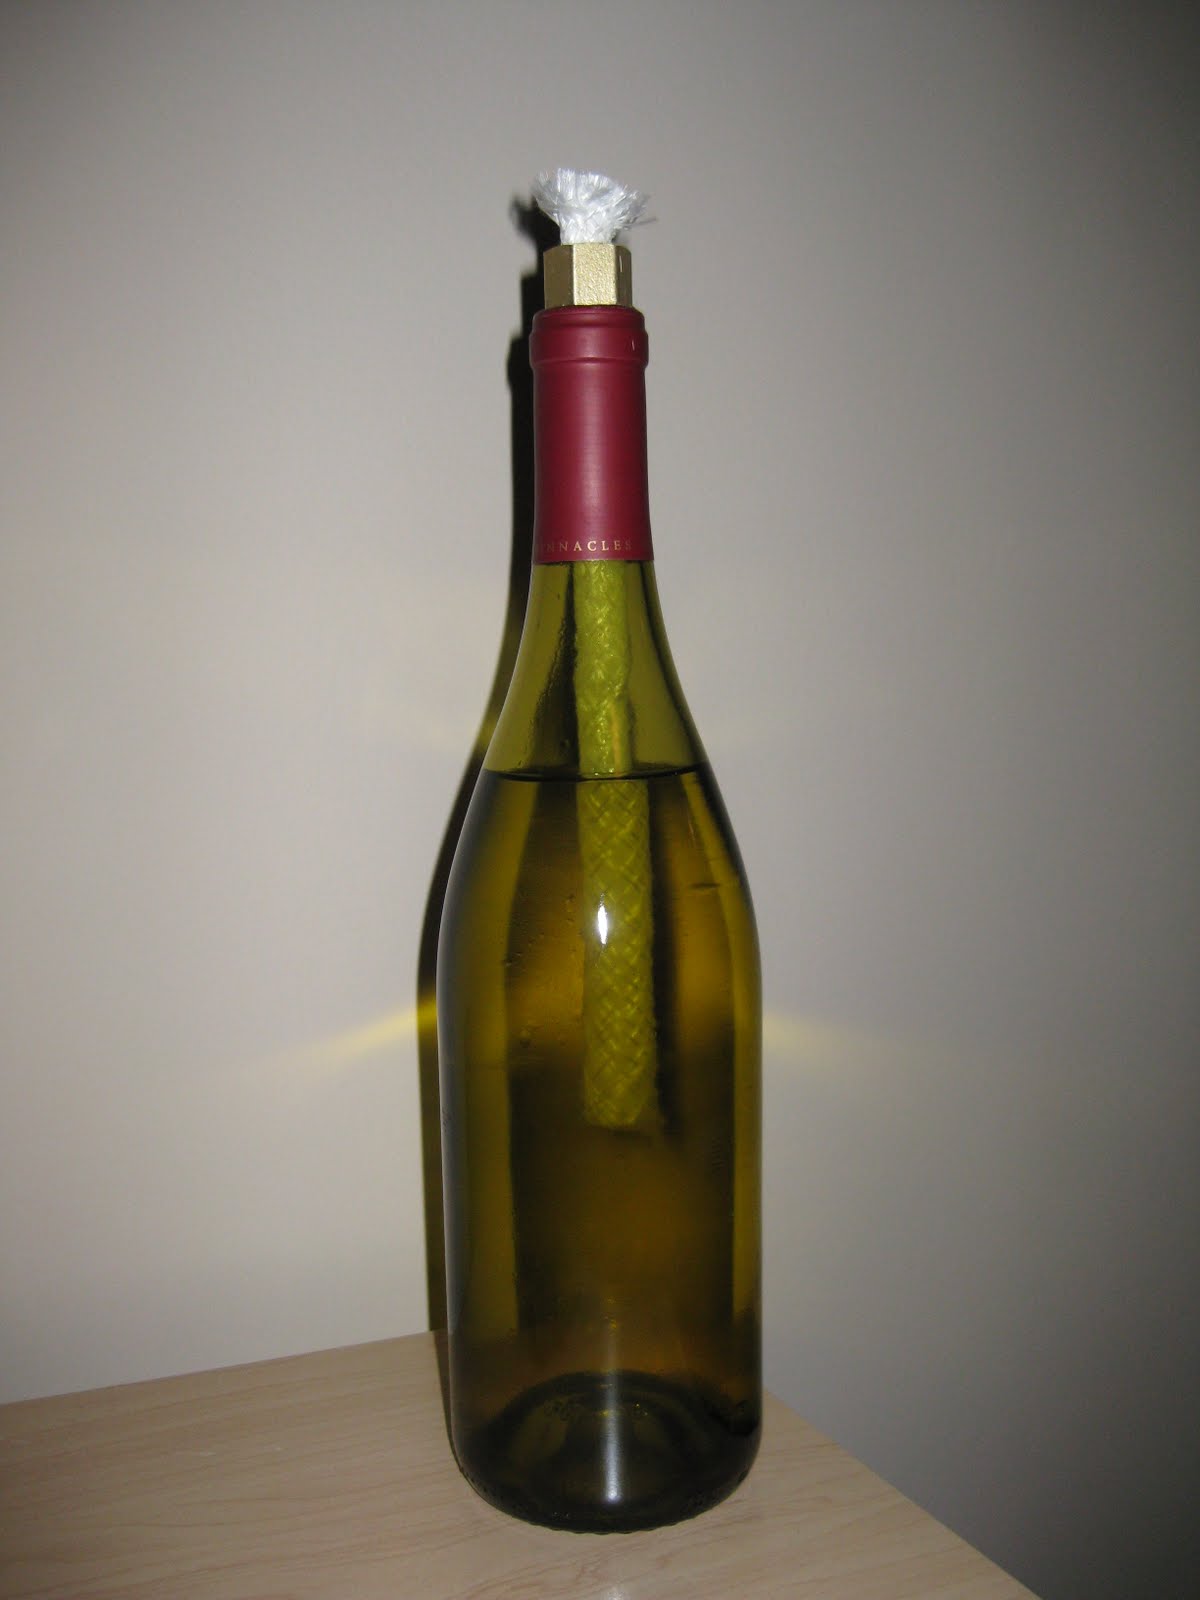
I had attended a cookout a few weeks ago, and hanging along the fence in the backyard were wine bottles that had been rigged up to serve as citronella candles. Now I love cheesy tiki torches as much as anybody else, but for a mere $6 per candle (minus the actual citronella oil), I couldn't resist giving it a go.
The bill of materials for this is pretty straight forward.
1) Empty wine bottle
2) Teflon tape
3) 3/8 to 1/2 copper adaptor
4) 1/2 copper cap
5) Tiki torch wick

Of course, since nothing can ever work the first time around, I found that the threaded adaptor I had bought was just barely too big to fit inside the bottle. A quick once over with the dremel and I was able to sand it down enough that it fit inside perfectly. This is where the teflon tape comes in handy. A few wraps around will bulk up the adaptor a bit, but since the tape gives a little under pressure, it creates a nice seal when inserted into the bottle.

After a little sanding...

A little tape...
You then thread the wick through the adaptor, fill the bottle up with oil, and you're done!

Woohoo!

I let it soak for about 30-45 minutes before I fired it up (the idea is that the oil burns, not so much the wick). I'd say for 10 minutes of work and about $6 per bottle, definitely something I'd recommend trying out.

Mosquito Repelling Molotov Cocktail


Monday, June 7, 2010

FRUSTRATION!

Of course something would go wrong, why I didn't plan on it I don't know. So after getting the engine started twice, I had the chain fall off and bury itself into the spokes, which in turn, taco'd the tire. Apparently the root cause of all this is the POS chain tensioner thats included with the kit.

This piece of crap...
So it seems that I can do without the tensioner, given that my frame has whats called "drop-outs", or the slotted part of the frame where the tire is mounted. This gives me the ability to simply adjust the rear tire back if I need more tension on the chain. So yippee...I guess. Still doesn't change the fact that I've already burnt the $$$ on two tires :(.

I'm gonna hit up the internets some more and try to get as much info as I can, because I'm really tired of buying tires. Ideally this will be the last weekend of construction, ideally.

Sadness D:

Saturday, May 29, 2010

Motorized Bicycle (Test Run)

So the bike is now 100% assembled (minus motor). I gave it a quick ride around the block to make sure I actually put it together correctly, and surprisingly, I did! One issue though, the clear coat on the rims and the rubber brakes do not like each other at all. Whenever I apply the brakes they let out this awful squealing sound. They also left nasty black circles on the rims :(. Sadly I'm not in possession of my camera at the moment, so no pictures available. Motor should be here sometime today, can't wait!

Sunday, May 23, 2010

Motorized Bicycle (Assembled!)

Finally got it all together! Well, the basics at least. Still needs the brakes put on, a new chain, and most importantly, the engine! Not to mention the headlight, taillight, turn signals...still a ways to go. But until then, I think I'll sit back and enjoy the view :).